Hidden Fields
When building forms within Force24, you may want to utilise hidden fields that don't appear on the user-facing form page, but the values are still attached to the submission data in the background.
A classic use case for this is an NPS survey, where you might want to give the form the impression of being anonymous but still retain tracking information regarding who has filled it out and what they answered. In this case you can have just the NPS survey questions showing on the form itself, but use a hidden field to pull through the email address of the contact submitting. There are many examples where you might not want the "email address" or other information to show on the actual form/landing page itself, but still need this information to be a part of the submission data or even mapped to the contact record - using hidden fields allows you to achieve this.
Cookies
It's important to note that if you are using hidden fields to link a submission to a particular contact in this way, it does rely on a cookie being dropped for the system to identify the contact/submitter by - usually an email click or some other form fill.
If the user hasn't dropped a cookie you won't be able to identify them and pre-populate the hidden fields in this way, so generally speaking any form like this should be sent as a link to known contacts via a Force24 campaign or email journey, to ensure contact tracking performs accurately.
How to add hidden fields to your form
Let's run through how to actually implement hidden fields in the form builder.
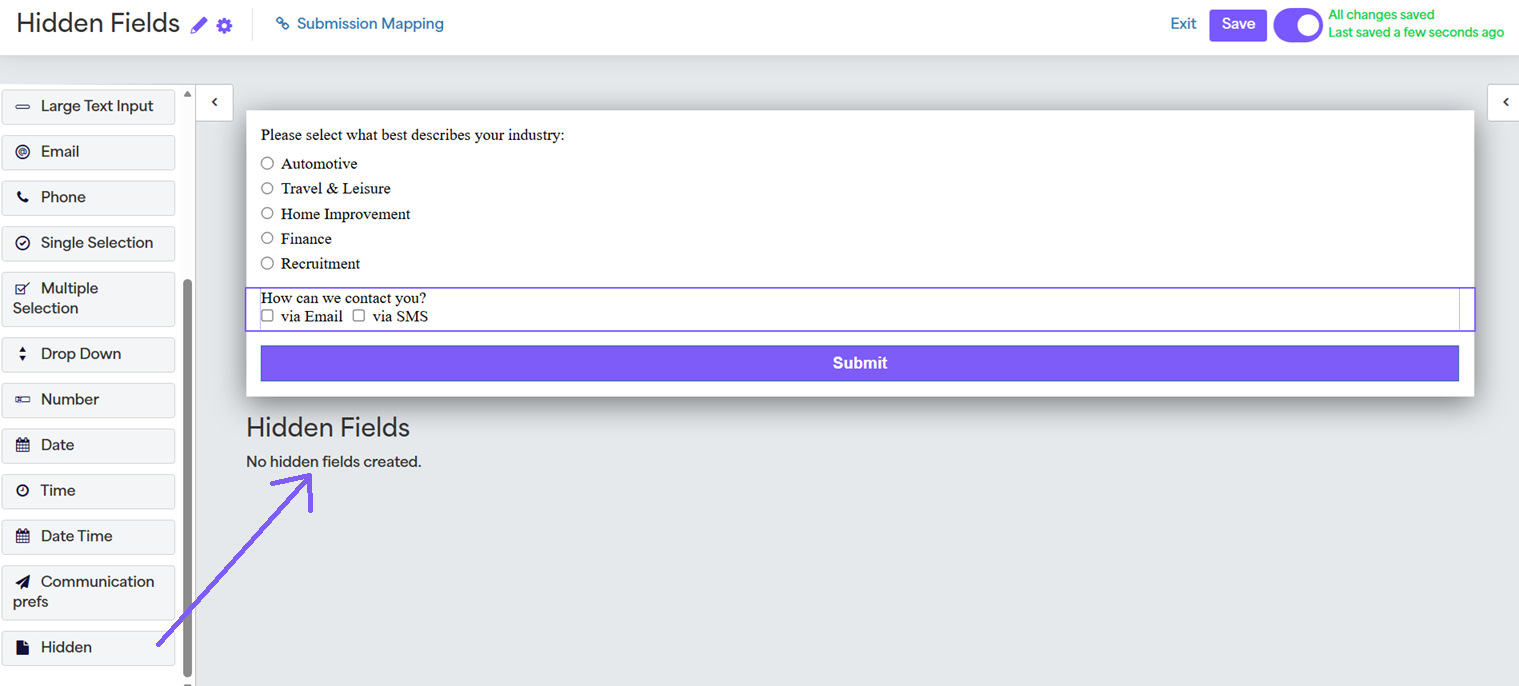
Firstly, once you've got your other user-facing form fields set up, you can start by simply dragging a new hidden field component to the relevant area below the form design/submit button:
Once you've added your new hidden field, you can click on it to bring up the right-hand menu, as shown below:
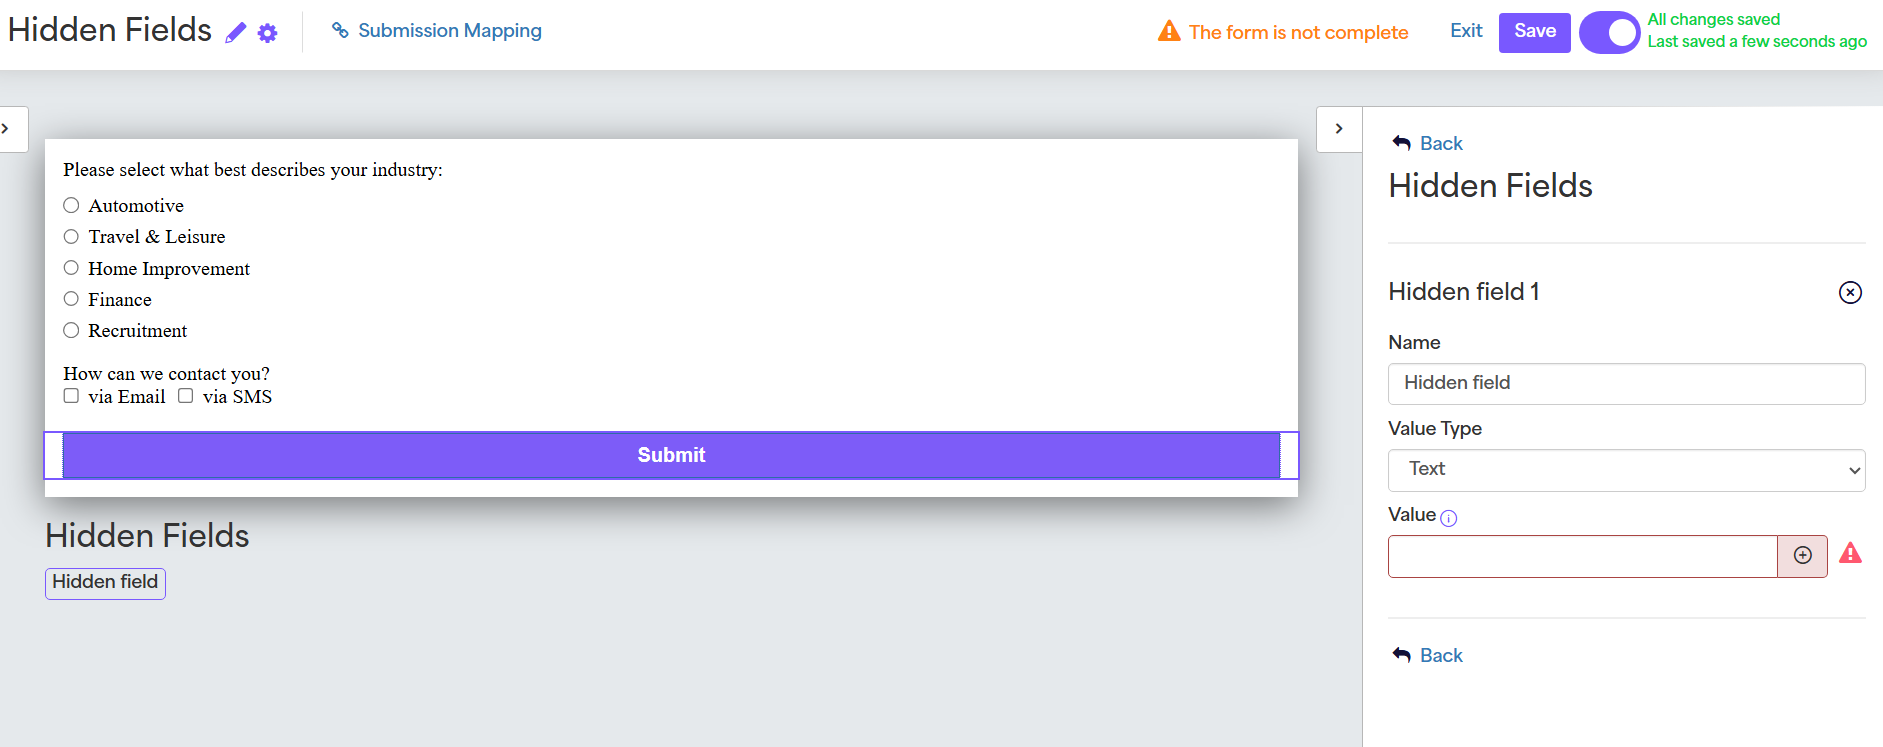
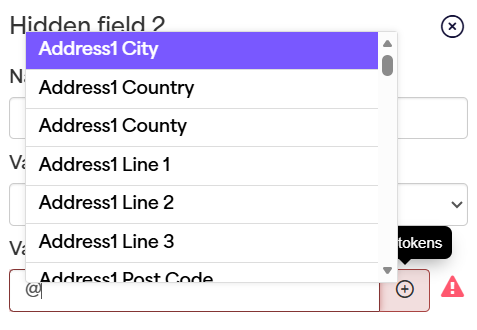
Then you can name the field, set the value type i.e. text, integer, datetime etc. and the value itself.
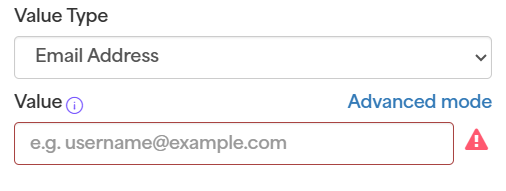
For the example of pulling through the contact's email address in the background, we can make sure we've select the Email Address value type and then use the "advanced mode" option and pull from the Email Address standard field:
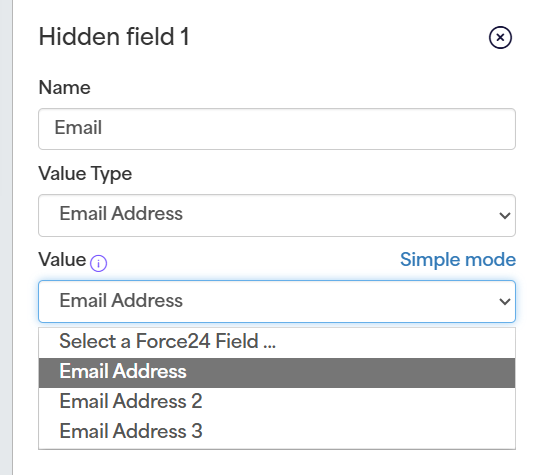
For other types of hidden fields you can select "use tokens" in the simple mode (depending on the value type) to pre-populate other information from the contact's Force24 record.
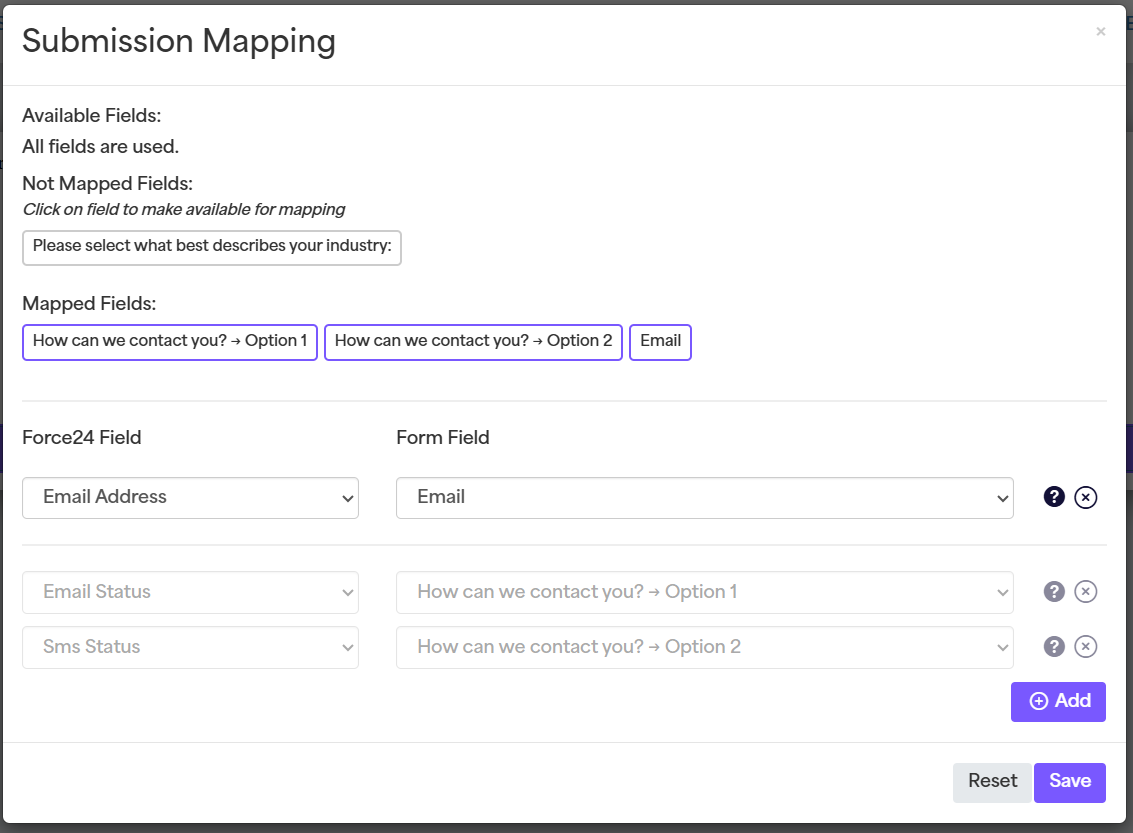
Once you've got all the hidden fields you need set up in this way, you will just need to make sure that information is mapped correctly in the "submission mapping" area:
Use the "add" button at the bottom of the screen to add your new email address mapping, making sure to map your hidden field (here titled "email") to the relevant Force24 field in your account (in this case the standard "Email Address" field):
Testing your form
Once you have created and mapped all your hidden fields, you can embed the form on your Force24 landing page and then make sure to test it by sending yourself a test email with a hyperlink to the landing page URL where the form exists - this is important for testing forms with hidden fields as a cookie needs to be dropped for the contact information to pull through, as mentioned earlier on.
The use of hidden fields can allow for NPS surveys, streamlined forms for known contacts, and even gated content.
If you'd like some further assistance with a specific form/hidden field set up, make sure to reach out to our support team via our live chat, or book in a 1-1 training call with a product expert!